Quick Start Guide
Welcome to JDXI-Editor! This comprehensive quick start guide will get you up and running with your Roland JD-Xi synthesizer in minutes. Whether you’re a beginner or an experienced musician, this guide will help you unlock the full potential of your JD-Xi through powerful computer-based editing.
What You’ll Learn
This quick start guide covers: - Hardware Setup: Connecting your JD-Xi to your computer - Software Launch: Starting JDXI-Editor and initial configuration - Basic Navigation: Understanding the main interface components - First Sound Creation: Creating your first custom sound - Essential Workflows: Key techniques for effective sound design - Troubleshooting: Quick solutions for common issues
Prerequisites
Before you begin, ensure you have: - Roland JD-Xi Synthesizer: Any firmware version supported - Computer: macOS 10.14+, Windows 10+, or Linux (Ubuntu 18.04+) - USB Cable: USB-B to USB-A or USB-C cable - JDXI-Editor Installed: Follow the installation guide if not already installed
Hardware Setup
- Step 1: Connect Your JD-Xi
Connect your Roland JD-Xi to your computer using a USB cable:
# Use a USB-B ('host') to USB-A or USB-C cable
# Connect USB-B end to the JD-Xi's USB host port
# Connect USB-A/USB-C end to your computer
Important Notes: - Use the USB host port on the JD-Xi (not the USB device port) - Ensure the cable is properly seated in both devices - Try different USB ports if connection issues occur
- Step 2: Power Up Your JD-Xi
Turn on your JD-Xi synthesizer:
# Power on the JD-Xi
# Wait for the instrument to fully boot up
# Verify the display shows normal operation
Troubleshooting: - If the JD-Xi doesn’t power on, check the power adapter - Ensure the instrument is in the correct mode for MIDI communication - Check that no other MIDI applications are using the JD-Xi
- Step 3: Verify MIDI Connection
Check that your computer recognizes the JD-Xi:
# macOS: Open Audio MIDI Setup
# Windows: Check Device Manager for MIDI devices
# Linux: Use aconnect -l to list MIDI devices
Software Launch
- Step 1: Start JDXI-Editor
Launch the JDXI-Editor application:
# macOS: Applications folder > JD-Xi Editor.app
# Windows: Start Menu > JD-Xi Editor
# Linux: Run the AppImage or use command line
Alternative Launch Methods: - Python Module (recommended for source install):
python -m jdxi_editor.main- Command Line:jdxi_manager(if installed via pip and entry point is configured)- Step 2: Initial Configuration
The software will attempt to auto-connect to your JD-Xi:
# Auto-connection should detect your JD-Xi
# If successful, you'll see MIDI indicators active
# If not, a MIDI configuration window will open
SoundFont Mode (No Hardware): You can run JDXI-Editor without a connected JD-Xi by enabling Enable FluidSynth for local playback in MIDI Configuration. This uses a SoundFont (.sf2/.sf3) for MIDI playback. See features-and-usage for SoundFont setup.
Manual MIDI Configuration: If auto-connection fails, manually configure MIDI ports:
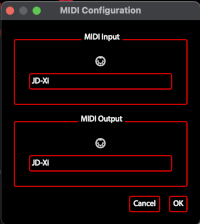
MIDI Configuration Window
Open MIDI Settings: Go to Settings > MIDI Configuration
Select Input Port: Choose the JD-Xi MIDI input port
Select Output Port: Choose the JD-Xi MIDI output port
Test Connection: Verify MIDI communication is working
Save Settings: Your preferences will be remembered
- Step 3: Verify Connection
Confirm that MIDI communication is working:
# Check MIDI indicators in the interface
# Play notes on the JD-Xi keyboard
# Verify the software responds to MIDI input
# Test parameter changes from the software
Interface Overview
- Main Components
JDXI-Editor consists of two main windows:
- 1. JDXi Instrument Window
Virtual Keyboard: Play notes using your computer keyboard
MIDI Indicators: Show active MIDI communication
Quick Access: Fast access to common functions
Status Display: Current settings and connection status
- 2. Editor Windows
Digital Synth Editors: Parts 1 & 2 with multi-partial control
Analog Synth Editor: Classic analog synthesis
Drum Kit Editor: 36 individual drum voices
Effects Editor: Master effects processing
Vocal Effects Editor: Voice transformation and vocoder
Arpeggiator Editor: Pattern generation and sequencing
Pattern Sequencer: Multi-part step sequencing
MIDI File Player: File playback and recording
- Navigation Basics
Tabbed Interface: Switch between different editors
Parameter Controls: Sliders, knobs, and buttons for real-time control
Preset Management: Load, save, and organize your sounds
Real-time Updates: Changes are instantly sent to your JD-Xi
Your First Sound Creation
- Step 1: Choose an Editor
Start with the Digital Synth Editor for your first sound:
# Open the Digital Synth Editor
# Select Part 1 or Part 2
# Load a factory preset to start
Recommended Starting Points: - Digital Synth Part 1: Good for lead sounds and melodies - Analog Synth: Great for bass sounds and warm tones - Drum Kit: Perfect for rhythm and percussion
- Step 2: Explore Basic Parameters
Familiarize yourself with the main controls:
# Oscillator: Choose waveform and adjust pitch
# Filter: Set cutoff frequency and resonance
# Envelope: Adjust attack, decay, sustain, release
# Effects: Add reverb, delay, or other effects
Parameter Categories: - Oscillator: Waveform selection, pitch control - Filter: Cutoff, resonance, filter type - Envelope: ADSR controls for shaping sound - Effects: Reverb, delay, distortion, compression
- Step 3: Make Your First Changes
Start with simple parameter adjustments:
# Adjust filter cutoff to change brightness
# Modify envelope attack for different attack characteristics
# Change oscillator waveform for different timbres
# Add effects for spatial and harmonic enhancement
Safe Starting Points: - Filter Cutoff: Start at 50% and adjust to taste - Envelope Attack: Begin with medium attack (50-70%) - Effects Mix: Start with subtle effects (20-30% mix)
- Step 4: Test Your Changes
Play notes to hear your modifications:
# Use the virtual keyboard in the Instrument Window
# Play notes on your MIDI controller (if connected)
# Use the JD-Xi's built-in keyboard
# Test different octaves and playing styles
- Step 5: Save Your Creation
Save your first custom sound:
# Go to Preset Management
# Choose "Save As" or "Save New"
# Give your preset a descriptive name
# Choose a category for organization
Essential Workflows
- Basic Sound Design Workflow
Follow this process for effective sound creation:
Start with a Preset: Load a factory preset as a starting point
Identify the Character: Understand what makes the sound unique
Make Targeted Changes: Focus on specific parameters
Test and Refine: Play and adjust until satisfied
Save Your Work: Preserve your creation
- Multi-Editor Workflow
Use multiple editors for complex sound design:
Create Base Sound: Start with one synthesizer part
Add Layers: Use other parts for additional elements
Apply Effects: Add master effects for polish
Create Patterns: Use arpeggiator or sequencer for movement
Record and Playback: Use MIDI file player for production
- Performance Workflow
Optimize for live performance:
Prepare Presets: Create and organize your performance sounds
Set Up Controllers: Configure MIDI controllers for real-time control
Test Everything: Verify all sounds and controls work properly
Create Setlists: Organize presets for your performance
Practice Transitions: Smoothly switch between sounds
- Production Workflow
Integrate with your DAW and recording setup:
Export MIDI: Send patterns and sequences to your DAW
Record Audio: Capture your JD-Xi’s output
Sync Timing: Ensure proper synchronization
Mix and Master: Process your recordings
Archive Projects: Save your work for future use
Quick Tips for Success
- Sound Design Tips
Start Simple: Begin with basic parameters before complex modulation
Use Your Ears: Trust your musical instincts
Save Frequently: Don’t lose your work
Experiment: Try unexpected parameter combinations
Learn from Presets: Study how factory presets are constructed
- Performance Tips
Practice Transitions: Smooth preset changes during performance
Use Controllers: MIDI controllers enhance live performance
Monitor Levels: Keep an eye on audio levels
Have Backups: Always have backup sounds ready
Test Everything: Verify your setup before important performances
- Troubleshooting Tips
Check Connections: Verify USB and MIDI connections
Restart if Needed: Sometimes a restart solves issues
Check Logs: Review log files for error information
Update Software: Keep JDXI-Editor updated
Ask for Help: Use community resources when stuck
Common Issues and Solutions
- Connection Problems
No MIDI Detected: Check USB cable and port connections
Software Won’t Start: Verify installation and system requirements
MIDI Not Working: Check MIDI port configuration
Latency Issues: Close other MIDI applications
- Sound Issues
No Sound: Check audio connections and levels
Distorted Sound: Reduce input levels or effects
Parameter Changes Not Working: Verify MIDI communication
Presets Not Loading: Check file permissions and locations
- Performance Issues
Slow Response: Close unnecessary applications
High CPU Usage: Reduce real-time processing
Memory Issues: Restart the application
Interface Lag: Check system resources
Next Steps
- Explore Advanced Features
Once you’re comfortable with the basics:
Read the Full Documentation: Detailed guides for each editor
Try Advanced Techniques: Cross-modulation, complex effects chains
Create Your Own Presets: Build a personal sound library
Integrate with DAW: Use JDXI-Editor in your production workflow
Join the Community: Connect with other users and share knowledge
- Recommended Learning Path
Master the Basics: Get comfortable with basic sound design
Explore Each Editor: Learn the capabilities of each editor type
Advanced Techniques: Try complex modulation and effects
Performance Integration: Optimize for live performance
Production Workflow: Integrate with your recording setup
- Resources for Further Learning
User Guide: Complete documentation for all features
Video Tutorials: Visual guides for complex techniques
Community Forums: Ask questions and share knowledge
Preset Libraries: Download and study other users’ creations
Regular Updates: Stay current with new features and improvements
Congratulations! You’re now ready to start creating amazing sounds with JDXI-Editor. Remember, the best way to learn is by experimenting and having fun with your Roland JD-Xi synthesizer!